Indholdsfortegnelse
Back to How tos.
How to wiki
General use
Here is a link. If the mouse is moved over the link and pressed1) on the left2) mouse button, the site will open.
You can only edit the pages you have permission to edit. It is in general only possible for KABS to edit the wiki. The edit button is visible, if you have permission to edit.
Clicking it will take you to the editing page.
Syntax
The Study Start Wiki uses DokuWiki and with this comes lots of syntax. The most common is:
DokuWiki has bold, italics, underline and monospaced font. It can be combined.
DokuWiki has **bold**, //italics//, __underline__ and
''monospaced'' font. it can be **__//''combined''//__**.
Headings
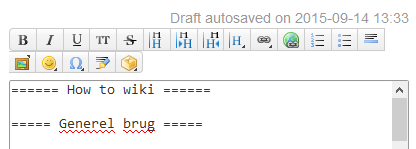
Bold font is not the same as a heading. If you use a heading, a table of contents is automaticly created. You make headings like this
====== Level 1 ======
===== Level 2 =====
==== Level 3 ====
=== Level 4 ===
== Level 5 ==
Which will look like this
Level 1
Level 2
Level 3
Level 4
Level 5
..
Links
You can make links to other pages on the wiki as well as other web pages.
You can make [[en:vektor:vektor|links to other pages]] on the wiki
as well as other [[http://google.com|web pages]].
Placement
Images
If you want multiple images side by side, you can use the following wrap-class on the images in question
  <WRAP group>
  <WRAP half column>
      {{ :img_20150823_103138.jpg?300 |}} //The image's name and size
  </WRAP>
  <WRAP half column>
      {{ ::img_20150823_121106.jpg?300 |}} //The image's name and size
  </WRAP>
Text
If there is to much list information, it might be smart to create to columns, so they don't take up too much space. It will look like this
- Klintehytten
- Klinteborg
- Sejerborg
- Skamlebæk
- Sommerlejren
..
It can be done with the following code:
  <WRAP col2>
    * Klintehytten
    * Klinteborg
    * Sejerborg
    * Skamlebæk
    * Sommerlejren
  </WRAP>
  <WRAP clear/>
Tables
If you want to create tables, use the following method:
   <^Year | Name 1 \\ Name 2 | Phone 1 \\ Phone 2 |>
   ^ denotes a table
   | denotes a new column
   \\ new line in the table
| Year | Name 1 Name 2 | Phone 1 Phone 2 |
|---|
Upload files to the wiki
In order to upload files to the wiki, follow these instructions:
This will bring you to the Media Manager. Here you can select the folder/supfolder that you wish to upload to, depending on where the file needs to be used. Then click the „upload“ button, and find the file you wish to upload.
In order to insert the file on the page, click the „Internal Link [L]“ button in the editor.
<[[how_to:how_to|File_name.xxx]]>
Write the name of the file in the last section, remember to add the file type at the end of the file name, for example „.pdf, .png“
Naming things
The wiki doesn't like æ, ø, å or other „special characters in page names. A page with the name Østersøen will be saved as ostersoen.
When you make a new link to a page, this replacement also occurs. Because of this, both ostersoen and ostersoen works.
Namespaces
On the wiki, you can make namespaces.
Example: [[rusturshytter:klinteborg]] is a link to klinteborg, which is a page in the namespace rusturshytter.
What can I use this for?
Not much, but wikiKABS uses them for important_things. For example can all vectors on Hylkedam edit pages and create new pages in the namespace called rusturshytter:hylkedam:*.
But! sometimes people can be confused by namespaces. A link will always refer to the current namespace, the link/the namespace [[:]] refers to root namespace and a namespace has a standard page called namespace:start…
I'm not a software student, and I understood nothing of that
The short version: If your link doesn't work, try writing : (colon) in front of the name. Example [[vektor]] → [[:vektor]].
If it still doesn't work, find a friend.


